
Hey guys!
Hope you’re having a great morning/day/night wherever you are in the world!!
So this week I have been feeling super DIY-y (is that even a thing?) and decided to consult Pintrest for some DIY ideas.
I came up with some cool, easy ideas to DIY your home. Here we go:
1. Melted Crayon Art
This is a super fun and creative way to bring lots of color into you home. Melted crayon art is one of my favorite DIYs ever!!
You will need:
– A canvas
– A hot glue gun
– A glue stick
– A hair dryer
– LOTS of crayons
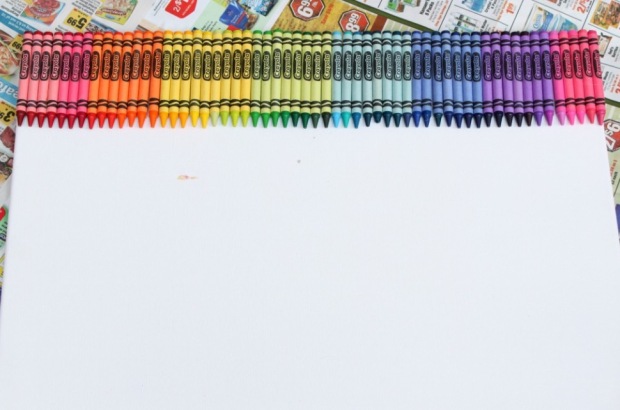
Step 1: Choose your colors
Pick out the crayon colors you want and line them up at the top of the canvas until there is no more room left (I think it’s really cool to do rainbow!!)

Step 2: Glue the crayons
Take the hot glue gun and make a line of glue across the crayons. Quickly stick them onto the canvas (remember, hot glue dries fast). Be sure to stick them with the tips FACE DOWN
Step 3: Melting the wax
This step is probably the hardest. Not “hard” hard, but it takes a long time. Cover your wall and floor with newspaper and lean the canvas against the wall. Then take your blow dryer and blow it onto the canvas (work in sections, don’t do the whole thing at once). Sometimes the crayons may splatter, so make sure the area you are working in is covered with newspaper. This step will probably take about an hour, depending on how your hairdryer is, because it takes a while for the wax to melt all the way down to the bottom. But keep in mind that it’s worth it!!

This is how the finished result looks:

2 . Light Bulb Aquarium
The finished product of this DIY is SO COOL!!! I definetly recommend trying this one
You will need:
– Bottle shaped glass light bulbs with screw on top (as many as you’d like)
– Pretty rocks and/or pebbles (available at your local craft store)
– Small glass floral beads (available at your local craft store)
– (optional) small Japanese Marimo moss ball (this gives it more of an “aquarium” look)
Step 1: Fill the lightbulb with decorations
Put the beads and rocks at the bottom of the lightbulb, in whichever design you like!

Step 2: Add the Marimo moss ball (if you’d like)
The moss ball just adds a touch of aquarium-ness (What is up with me and non-existing words? 😂)

Step 3: Adding Water
Fill up the bulb with water and then screw the cap on the lid. This step is pretty straightforward and simple 🙂

Repeat these steps for every aquarium you decide to make.
This is how the finished result looks:

3. Weekly Meal Planner
This one is good for people/families who have trouble finding a dinner that everyone will like 🙂 (it’s kind of long, but very creative and helpful)
You will need:
– Artist’s canvas (whichever size you’d like, but I prefer 11×16 inch)
– Spray adhesive
– Fabric
– Scissors
– Hot glue + hot glue gun
– Empty baking soda box
– Paint (or spray paint)
– Adhesive stickers (letters)
– Clothespins
Step 1: Spraying the canvas
Spray the canvas with spray adhesive. Use a lot, as you don’t want the fabric to separate from the canvas later
Step 2: Smoothing the fabric
Smooth the fabric over the top of the canvas. Make sure there aren’t any wrinkles!
Step 3: Stretching the fabric
Stretch the fabric over the sides of the canvas. Use the hot glue gun to secure the edges of the fabric to the back of the frame

Step 4: The baking soda box
Cut the empty baking soda box in half and coat all the sides with paint (you can use acrylic or spray paint)

Step 5: Gluing the box
Once the paint is dry, glue the box to the lower right corner of the canvas

Step 6: The cardstock
Cut out a piece of cardstock (3×5 inches). Stick the adhesive letters to the cardstock and then glue the cardstock to the canvas

Step 7: Clothespins
Take 7 clothes pins and glue them evenly to the left side of the canvas

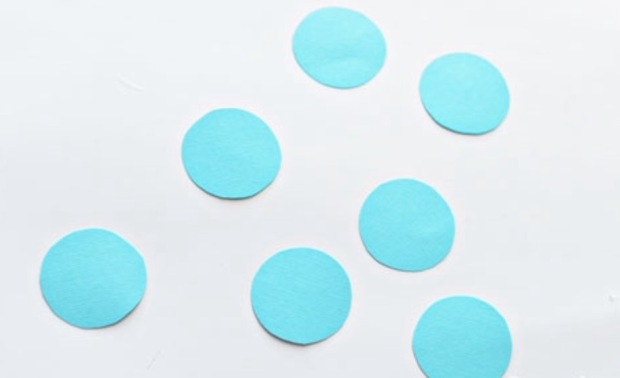
Step 8: Labeling
Cut 7 circles out of the cardstock and then stick the first letter of each day of the week to each circle. Glue one circle to each clothespin
Step 9: The last step!!
Cut out a bunch of strips of white cardstock and write one meal on each strip (brainstorm some meal ideas with your family!) then clip them to the clothespins
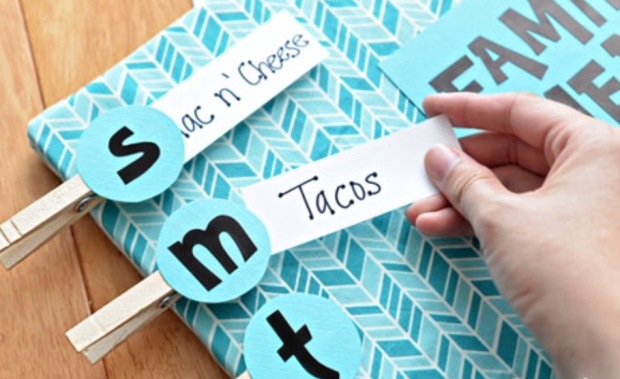
Heres what the end result looks like:

Hope you guys try these awesome DIY ideas!! They’re really fun and creative, and are a good art project if you’re feeling crafty.
If you do try one of these projects, let me know how it goes! How did the project turn out?? Just let me know in the comments!
Stargirl xx

The crayon canvas looks so great! X
https://laurenayersx.wordpress.com
LikeLiked by 1 person
Thanks!! It’s a fun project, you should try it xo
LikeLiked by 1 person
I want to do the family meal planner, it looks amazing! Xx
https://jessicajadebeauty.wordpress.com
LikeLiked by 1 person
I agree! This one was great and very helpful!! Xo
LikeLiked by 1 person
Some really great ideas! Thanks for the recent comment on my blog 🙂 Checked yours out and love it!!! Follow for follow?
LikeLike
Thanks so much!! Thanks for the follow ❤️
LikeLike
OMG THAT MENU IS AMAZING! What a good idea. Putting that on my to-do list. 🙂
LikeLiked by 1 person
Thanks so much!! It’s so fun to do and helpful!!
LikeLike
I really like the menu idea!
LikeLike
Thank you! Glad you liked it!
LikeLike
Very cute ideas!
LikeLiked by 1 person
Thank you!
LikeLike